Genesis
A seemingly simple project, this is one I’ve been thinking of making for a long time now. Mostly because I had acquired a couple of thermoelctric cooling elements and wanted to use them for something. That, coupled with a desire to keep my soda cold while writing code, pushed me into this challenge. Now, while in theory, this device is pretty simple. In fact, I’m pretty sure a few already exist that I could probably just buy, but there is no fun in that. The challenge comes in that thermoelectric coolers suck. They eat power, are terribly inefficient compared to compressor based cooling systems, and generate a lot of waste heat. In fact, I own a thermoelectric powered travel cooler and at best it could maybe keep stuff slightly colder than a regular cooler. It certainly couldn’t chill anything. However, they are solid state and small, that is if you don’t count the heat sink and fan required. The challenge is not just to build one, but build one that actually works.
Criteria for Success
A good project always needs a sound criteria for reaching success. Otherwise, how will you know when you’ve succeeded? In this case I’m going to set my goals rather high. The primary goal will to be to keep a 20oz plastic soda bottle ice cold, for an indefinite period, at average room temperature. I’ll set the standard for ice cold as 35 degrees Fahrenheit, about the temperature of the average refrigerator. Once I feel I’m close to the goal, I’ll probably have to design a test rig to get an accurate measurement. That’s a pretty stiff requirement, but to make it easier, I will focus on keeping a cold soda cold, rather than trying to chill a warm one. Another tough aspect is using a plastic bottle. Bottles tend to not have a lot of surface area that contacts the surface they are on, and the plastic probably won’t conduct heat very well. As an alternative goal, I can attempt to do the same with a 12 ounce aluminum can. Presumably a metal can would get better thermal transfer from the cooling surface, but at the same time would leak more heat into the air than the plastic bottle would.
Experimentation
Stop the World and Melt with Me, Build #1
My first experiment will make use of a cooling element I aquired some time ago from All Electronics. Here’s the specsheet they provided. The basic operation of these modules is to create a temperature differential between the hot side and the cold side. The spec on this module give a max temperature delta of 79 C (174 F). I wasn’t quite sure how to read the graphs on the sheet, but I figure at 12 volts I could hope for a 60 – 70 C (140 -158 F) delta. Now, that temperature difference, I assume, is from side to side of the element. So given the temperature gradient from the element surfaces to the surfaces I’ll be measuring, I probably won’t see that big of a delta.
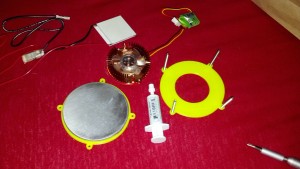
Supplies:
- Power Supply, 12 volt 10 amp, brick style (for monitor or TV) via Ebay, $12.99 USD.
- Aluminum Plate, 3 inch diameter, 1/4 inch thick, via Ebay, $13.15 for 2.
- Long machine screws and nuts, #10 x 1.5 inch, via TrueValue, $3.58 for 4 bolts and 14 nuts.
- Printed parts, via myself, (STL Files: Top, Bottom)
- Heatsink, via Newegg, $11.99
- Thermoelectric cooler, 40mm X 40mm, 80 Watt max, via AllElectronics, $14.75.
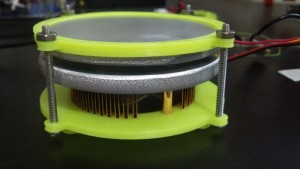
Unfortunately, this build had a couple issues from the start, which is a shame since it was rather small and quiet. First and foremost, the little chip set cooler heat sink/fan combo was ridiculously undersized. While it did cool the top side, the bottom side quickly rose to a fairly high temperature around 150 Fahrenheit. This not only above the max temperature rating for the element, but it also deformed the PLA frame.

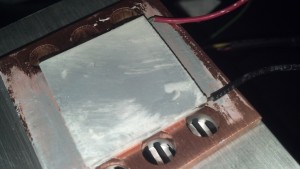
With the high temperature on the hot side, and the heat capacity of the top aluminum plate, I was only getting slightly less than 50 F on the plate. As a side note, I was having a difficult time measuring the temperature of the plate with my IR thermometer, as the reflectivity of the plate caused it to just return the room temperature. I finally figured out that a small piece of tape on the surface would give me the ability to measure it better. Since the aluminum discs I bought came in quantities of 2, I repeated the experiment with the extra disc between the element and the heat sink. This made it work better for a short period, but the heat quickly built up and the same situation occurred. The simple conclusion was that my heat-sinking was insufficient, and that a larger heat sink would be required to whisk away all the waste heat fast enough to keep the element working effectively.

Now I did try the same setup a second time with a different element that I also had. I also bought this from All Electronics a long time ago, but unfortunately they don’t sell that unit any more, so the specs are unknown. The only things I know is that the unit itself is smaller, 30mm square as compared the the other unit at 40mm square, and the smaller unit drew about 2.5 A when first powered on as opposed to about 5.5 A that the other unit drew at 12 V. This configuration was at least stable, the hot side topped out at about 110 F, and the top disc dropped to about 45 F. I would have expected a higher temperature difference to have developed, but I think the smaller unit lacked the cooling power to get the 1/4 inch thick disc any colder.
Build #2
Armed with the knowledge that I was not sinking enough heat, I got a slightly larger, cheap CPU heat sink, about $9.99 from NewEgg. I also purchased two more of the 3 inch diameter aluminum discs from eBay, just in case. After a few experiments, I was having the same issue with the large cooler, heat would build up extremely fast on the hot side, limiting the temperature drop on the top side. I also had the same issue with the small cooler, not being able to drop the temperature of the disc very well. Although testing the small unit on the new heatsink, without the top disc revealed that the units were reaching a good temperature, just below 30 F, cold enough to form a bit of frost on the top.

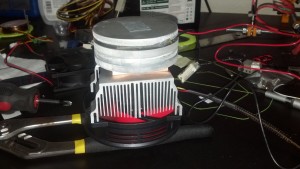
I experimented more with the large unit, using the 3 spare discs in increase the mass of the heat sink. Although I used quite a bit of thermal paste, I feel that the effectiveness was limited by the heat transfer between the discs. But it did seem to work better.

As you can see, I didn’t bother making a frame for this experiment, I may have been a bit premature on printing a frame for the first build. With this setup, it initially worked fairly well with the big element, dropping the top plate temperature down to about 25 F. This seemed promising, but the hot side rose to around 140 F after
5 minutes or so, which brought the top disc up to around 40 F. I shut it down around then, because i didn’t know when or if it would achieve a stasis. I did test this with the smaller cooler, which did reach a static state, just under 100 F on the hot side, and about 50 F on the cold disc. I removed the top plate to measure the unit directly, and showed about 30 F on the top of the unit. A similar direct measurement of the top of the larger unit showed an initial temperature of -10 F, again that quickly rose with the heat buildup on the other side.
General Observations
While part 1 of this project has not left us with a unit that can meet the project goal, we have learned a lot that will hopefully lead to that. Let’s review.
- The large 40mm square, 80 Watt max cooling power element should have the cooling power required for this application, it demonstrated the ability to quickly cool the aluminum disc, and showed a fairly high temperature delta.
- The heatsink needs to be larger to support the large cooling element. It generated tons of waste heat, that all heat sink configurations in the experiment failed to dissipate quickly enough to reach a static state.
- The small cooling element, of unknown spec, did not have the cooling power required to keep the aluminum disc at a low enough temperature for the application.
- All the tested heasink configurations were enough to bring the small cooling element to a static state.
Conclusions
- The large cooling element needs to be tested with larger, more effective heat sinks.
- The small cooling element will not be used in further experiments.
- I should explore different cooling elements to use.
That’s it for now. Hopefully in the next installment I can demonstrate a working unit!


Pingback: Fail of the Week: Project Frosty Mug is Merely Chilly
Pingback: Fail of the Week: Project Frosty Mug is Merely Chilly - RaspberryPiBoards
You should current limit your power supply for the cooling element. The unit is only rated for 8.1A max but your supply is rated for 10A so you could be overdriving the cooling element by 25% all of which is excess heat!